Integrating Codeaid with SmartRecruiters makes it easy to include real coding assessments as part of your hiring workflow. With this integration, you can add Codeaid assessments directly to a job's interview plan, send tests to candidates without leaving SmartRecruiters, and automatically receive results and detailed reports right on the candidate's profile. This streamlined process helps hiring teams quickly identify top performers and make data-driven decisions with less manual effort.
Integration Setup and Enablement in Codeaid
- 1
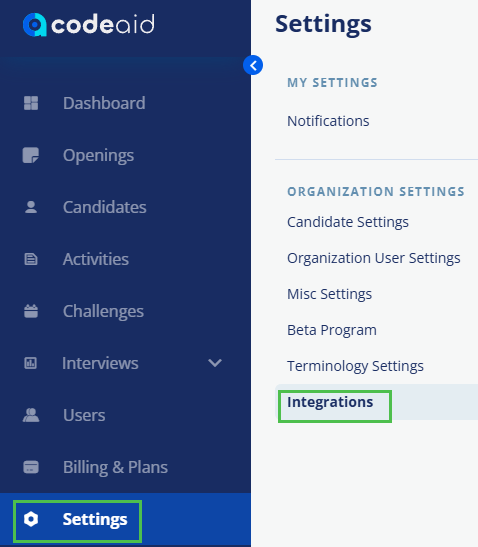
Log in to your Codeaid account as an Owner/Admin.
- 2
Open Settings > Integrations.
- 3
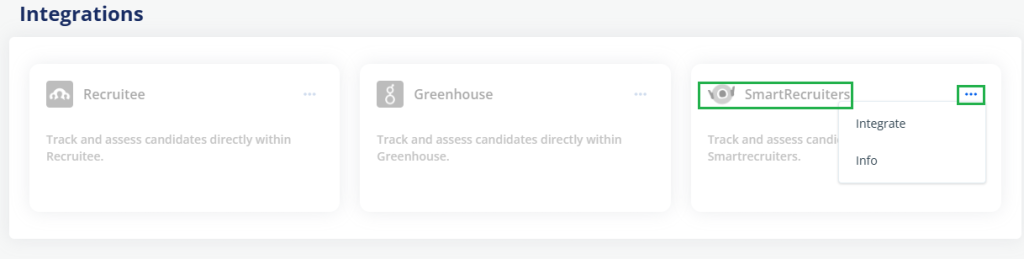
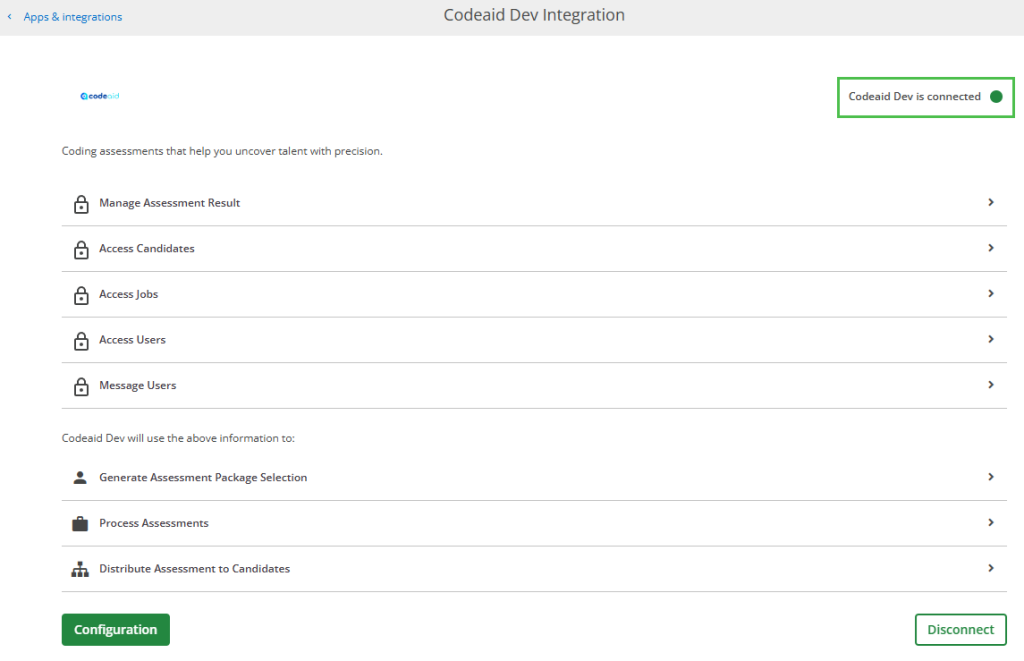
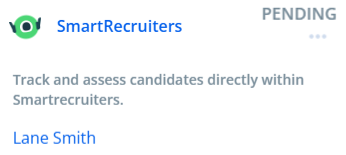
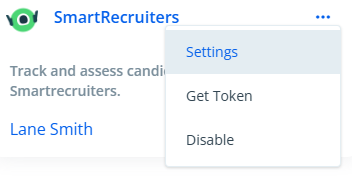
Locate the SmartRecruiters integration card and click the three dots.
- 4
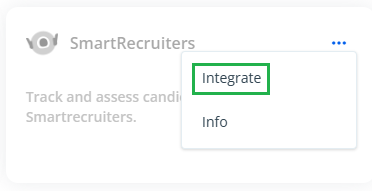
Click Integrate.

- 5
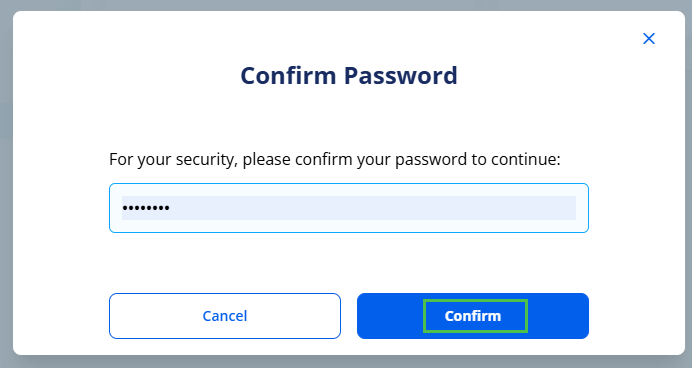
Codeaid will prompt you to confirm your password for security reasons.
- 6
Enter your account password and click Confirm.
- 7
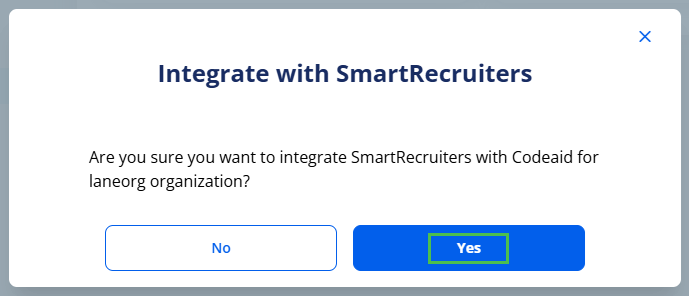
A confirmation pop-up will appear, stating that you are integrating your Codeaid organization with SmartRecruiters. Click Yes to continue.
- 8
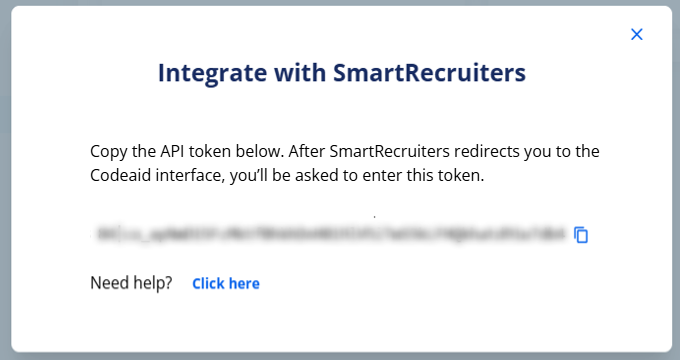
You will then be provided with a newly created API key.
- 9
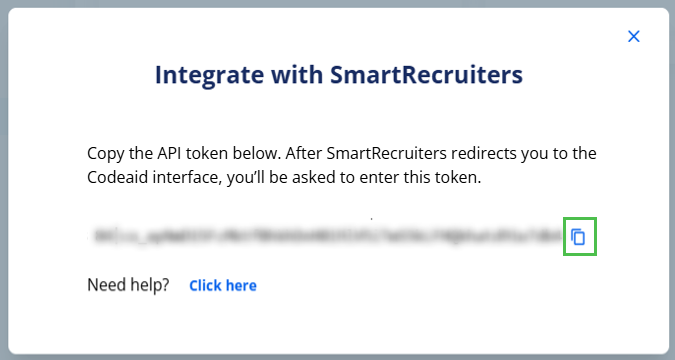
Copy the API key by clicking on the copy icon or manually selecting the key.
Note: If you accidentally close the pop-up, don't worry — you can reopen it by clicking Integrate again (refer to Step 4).
Enabling Integration via the Apps & Integrations Page in SmartRecruiters
- 1
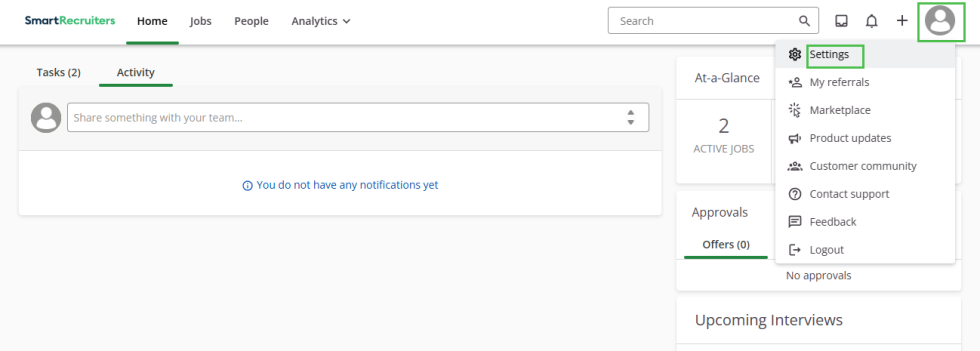
Log in to your SmartRecruiters account.
- 2
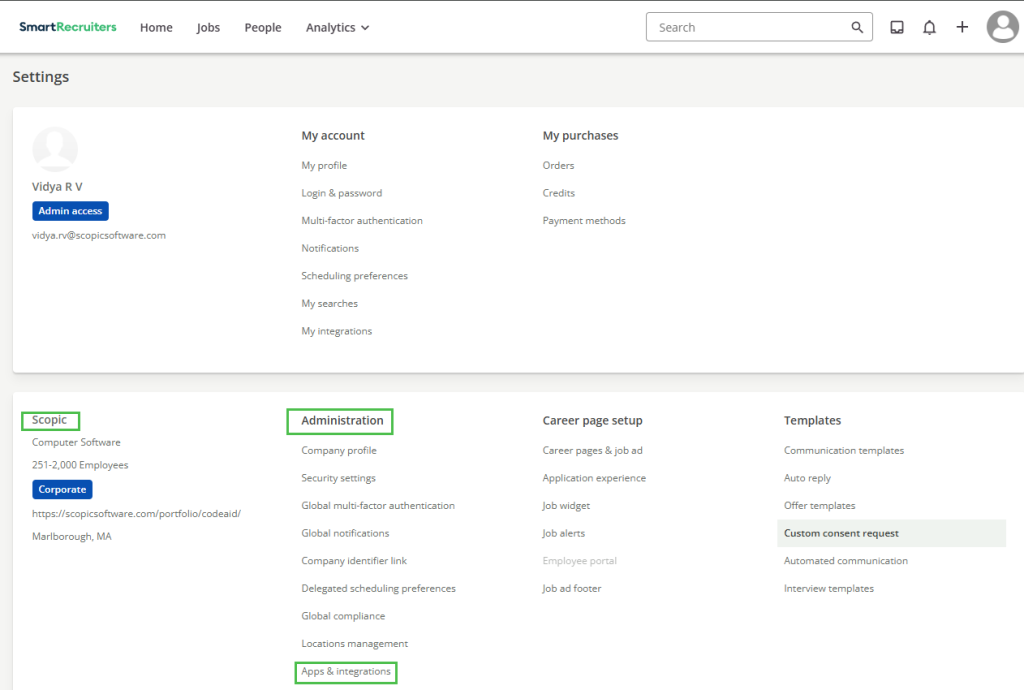
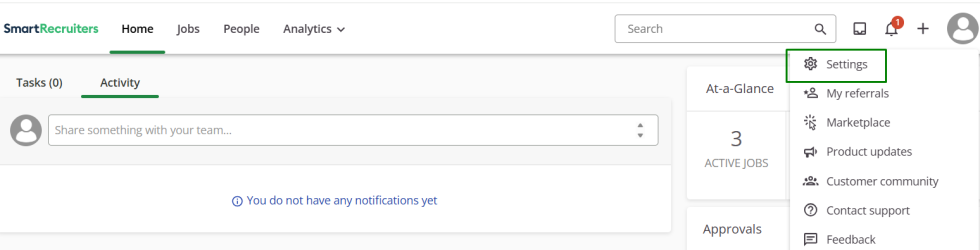
Click the avatar icon in the user profile, then click Settings.
- 3
Go to Scopic > Administration, click Apps and Integrations.

- 4
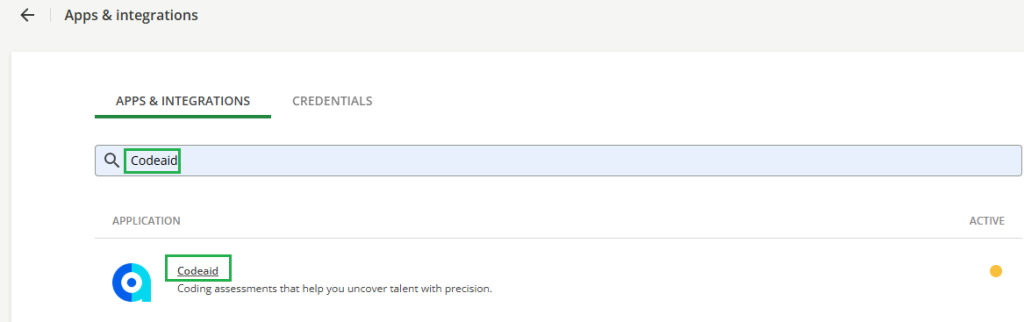
Search for "Codeaid".
- 5
Click on the Codeaid integration.
- 6
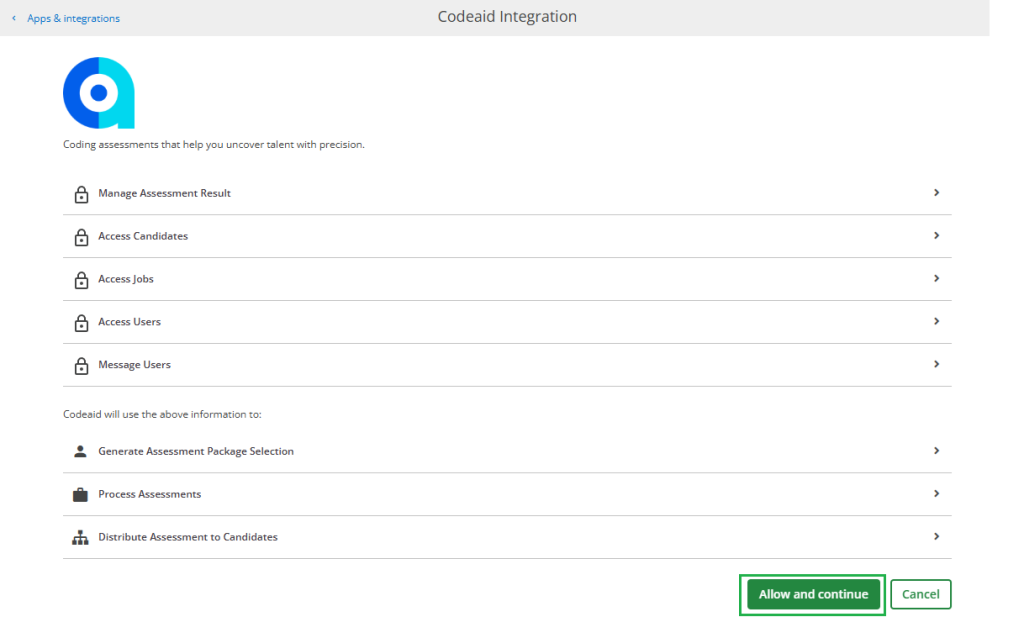
Click Connect to initiate the process.

- 7
Click 'Allow and Continue'.
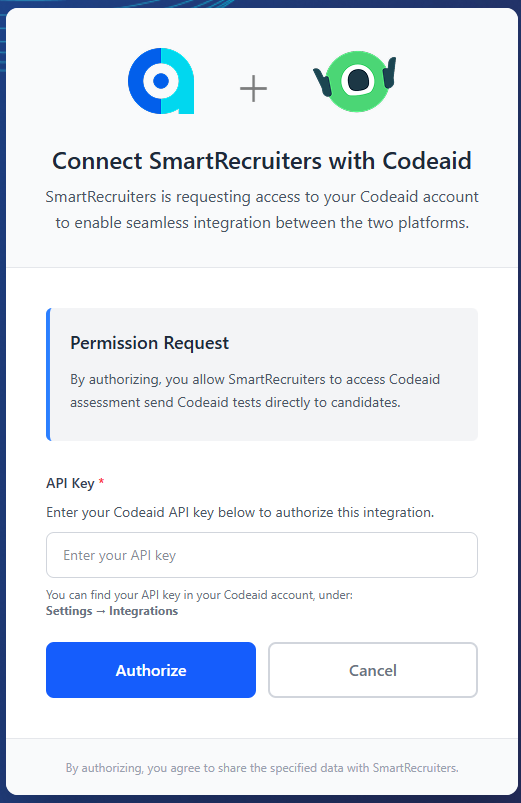
- 8
You will be redirected to Codeaid to enter your Codeaid API token.
- 9
Paste the API key into the 'API Key' field in SmartRecruiters.
- 10
Click Authorize. If there's an issue with the API key, you will see an error message. If the API key is correct, the pop-up will close.

- 11
You will be redirected back to SmartRecruiters, where you can see that the integration is now connected.
- 12
Back in Codeaid, the integration will take 2–3 minutes to fully activate.
- 13
After 3 minutes, refresh the page to confirm that the integration is complete.
Configuring Hiring Processes
- 1
Click the User Profile avatar icon.
- 2
Select Settings.
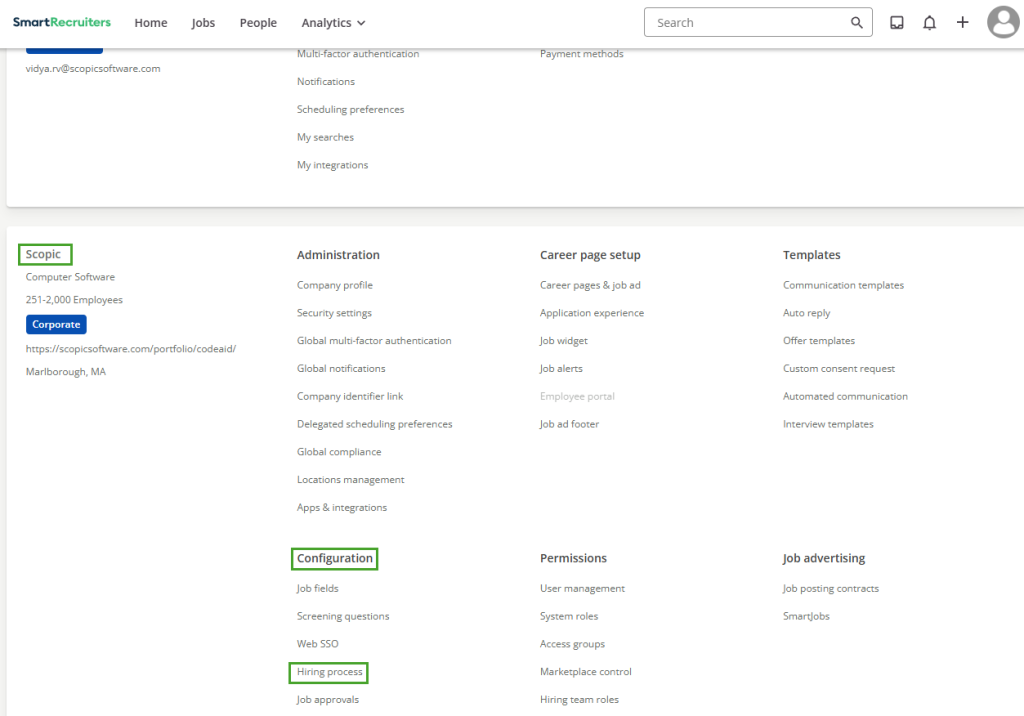
- 3
Under Scopic > Configuration, click Hiring Process.
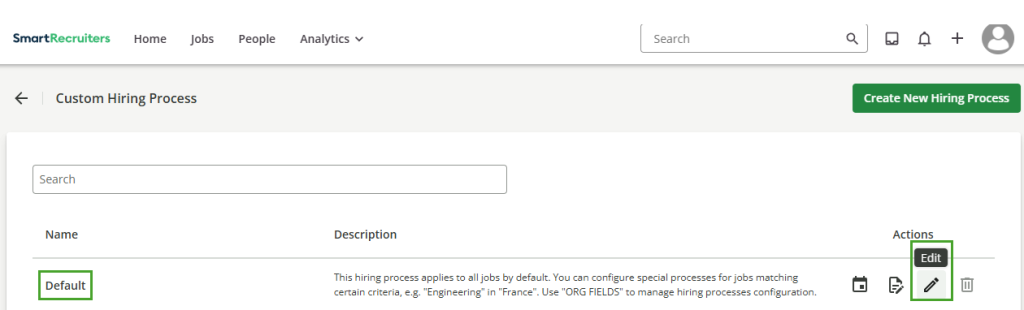
- 4
Edit the Default Hiring Process.
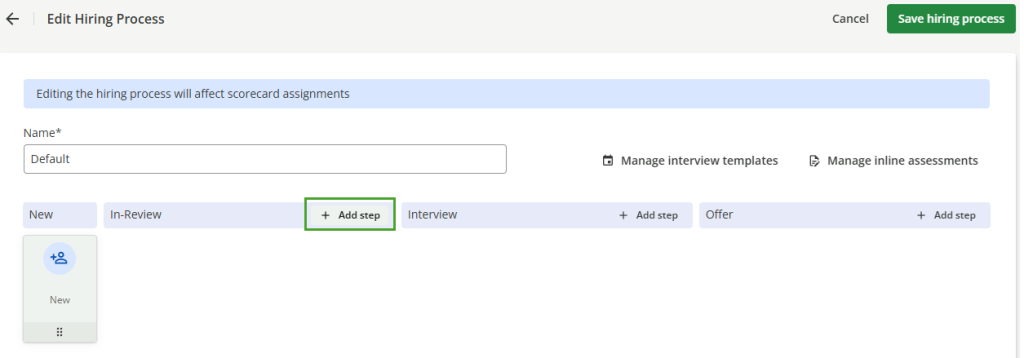
- 5
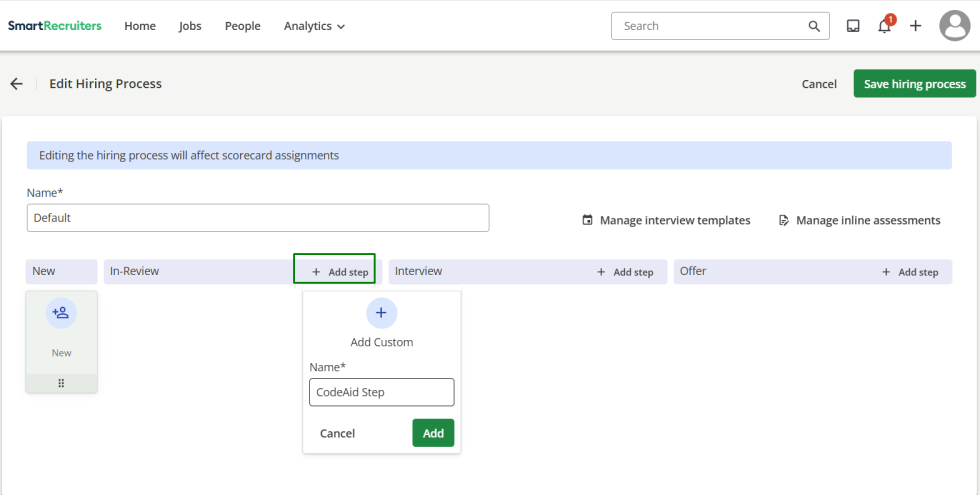
Choose any of these stages and click Add Step on any of the available stages (In Review, Interview, and Offer).
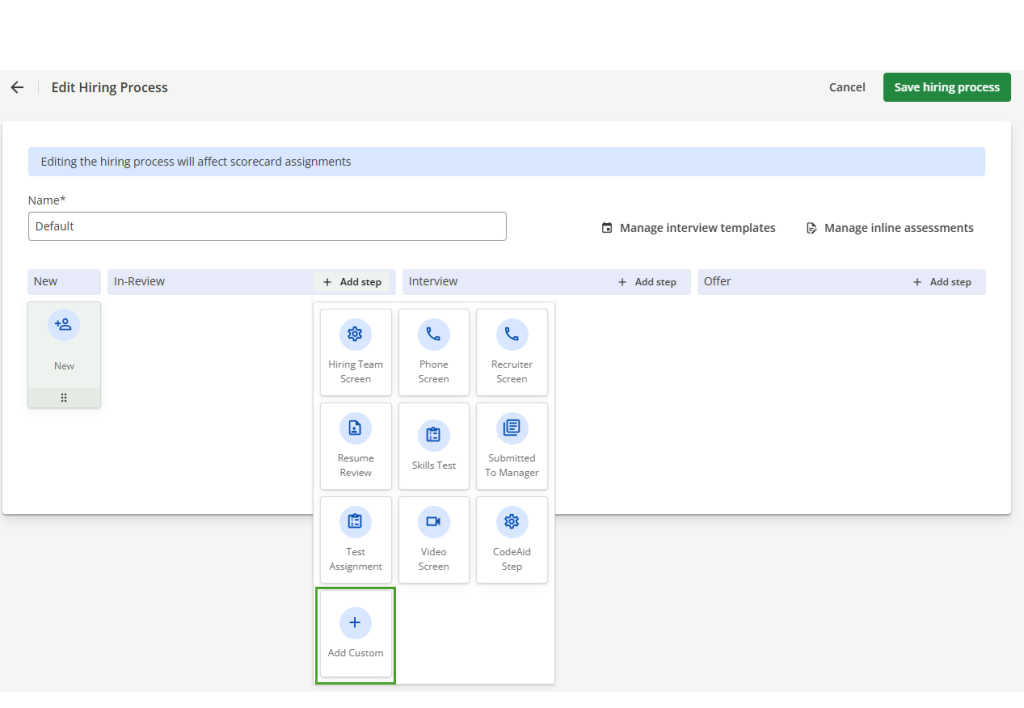
- 6
Click Add Custom.
- 7
Enter a custom step name and click Add.
- 8
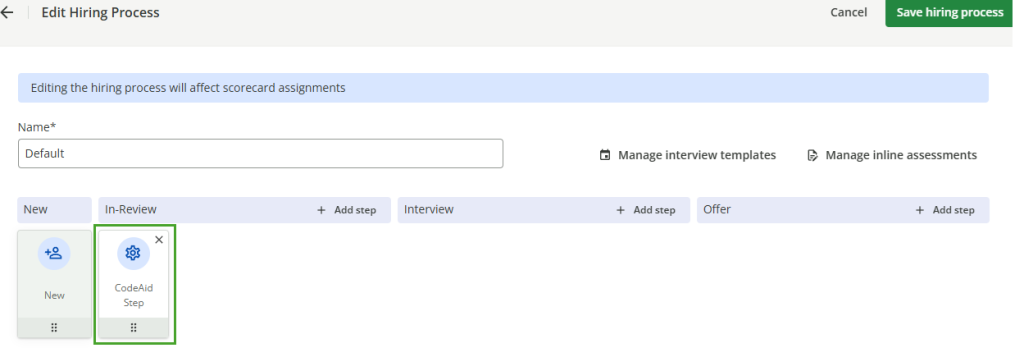
The new step will be added to the selected stage.

- 9
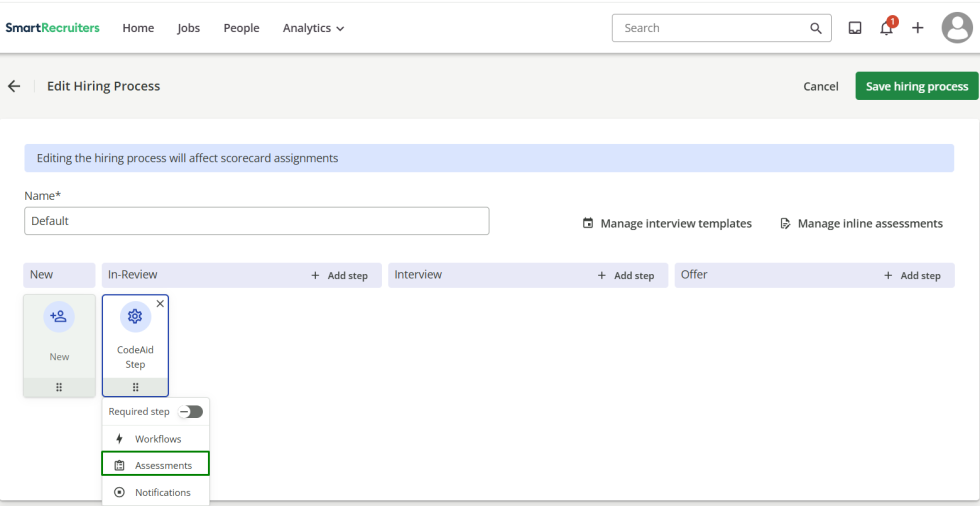
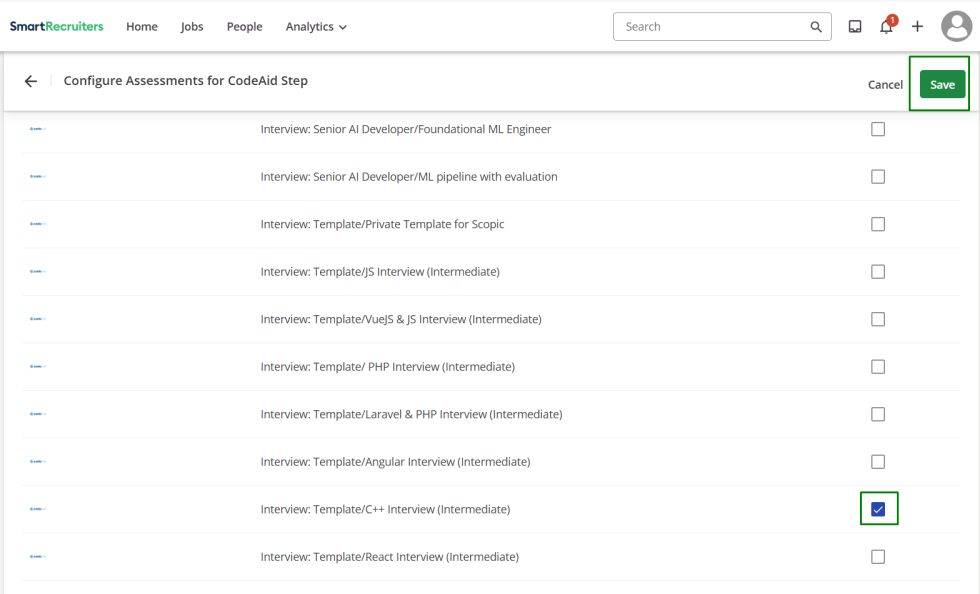
Click on the added step and click Assessments.
- 10
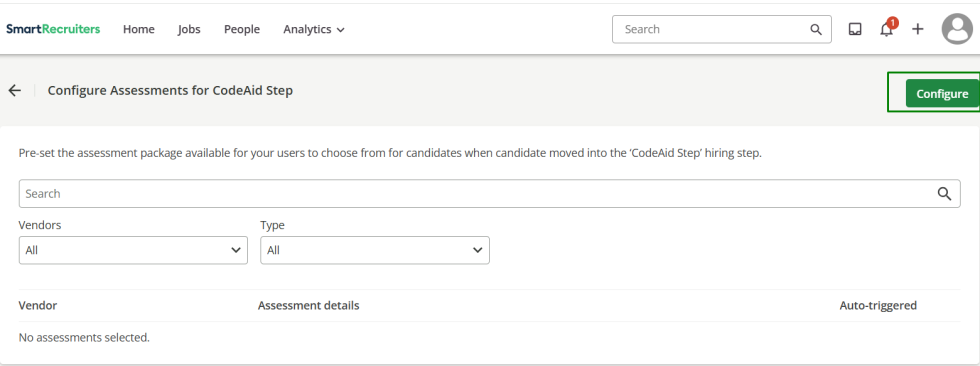
Click Configure.
- 11
Select the Codeaid test you want to associate with this step. Click Save.

- 12
Enable the Auto-triggered toggle for the Codeaid test.
- 13
Click Save to save the hiring process.
Integration Workflow — Manually Triggering an Assessment
- 1
Log in to your SmartRecruiters account.
- 2
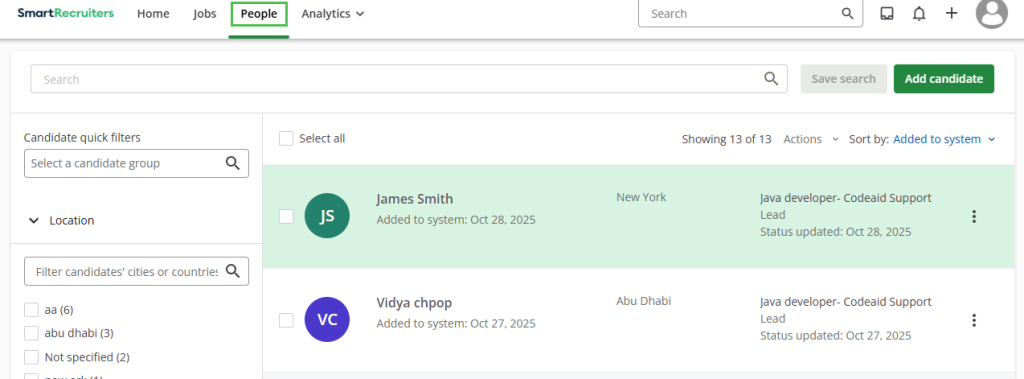
Navigate to the People page.
- 3
Open any candidate record.
- 4
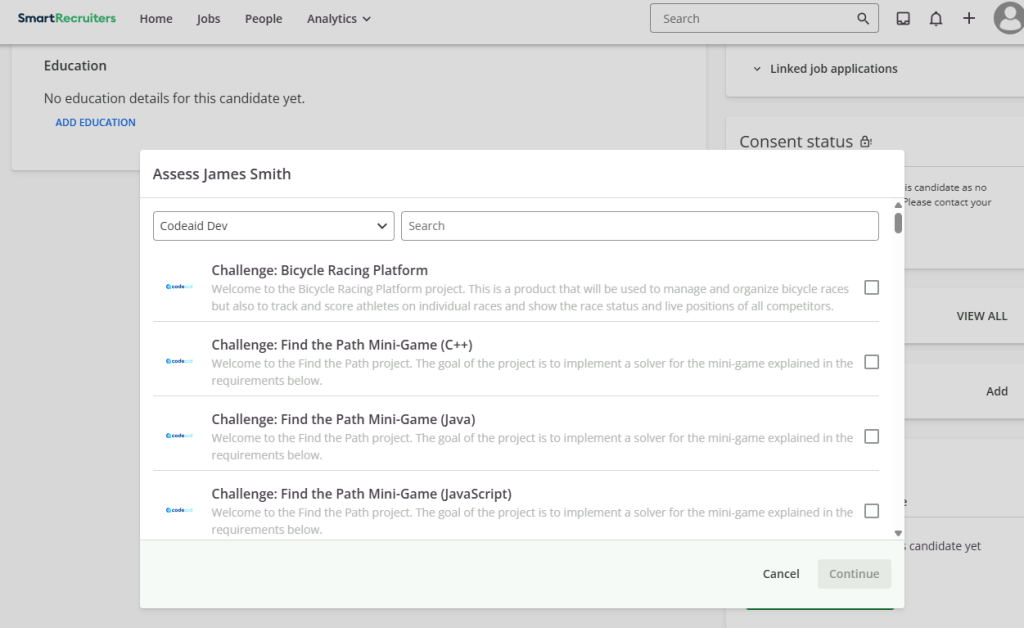
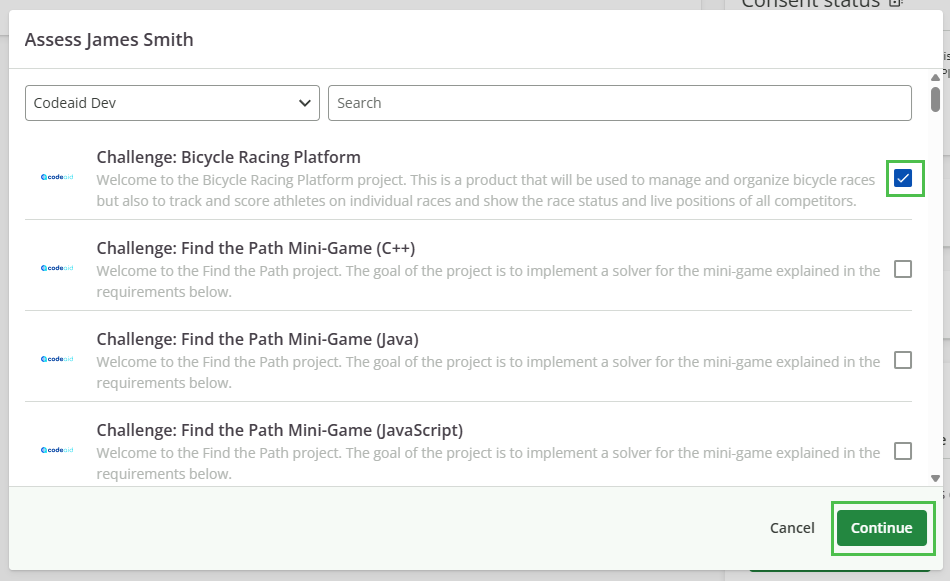
Under Assessments, click Order Assessments.
- 5
A pop-up listing all Codeaid tests will appear.
- 6
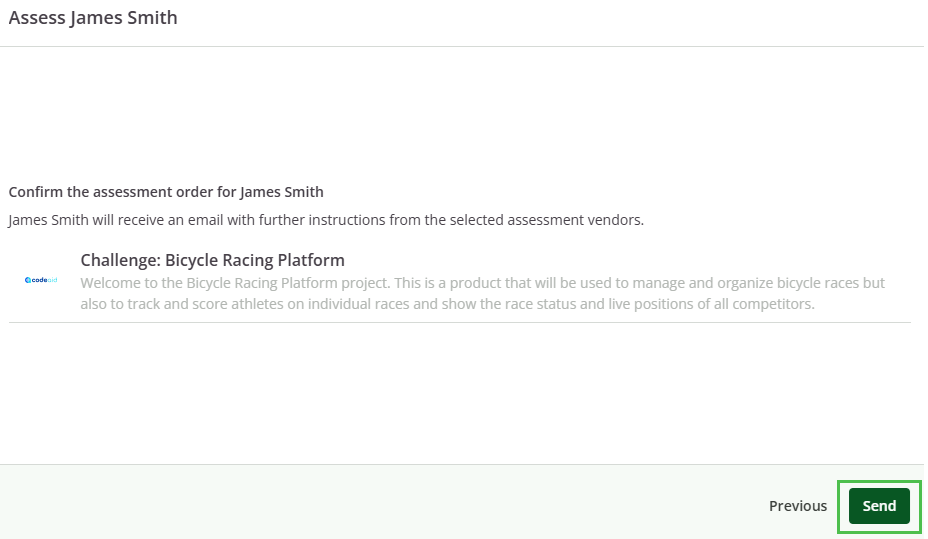
From the Tests dropdown, select a Codeaid test, click Continue.
- 7
Click Send.
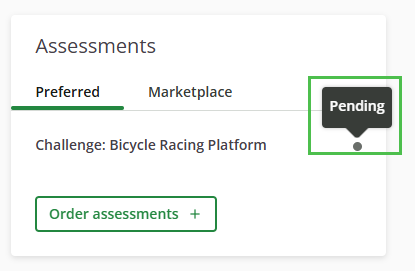
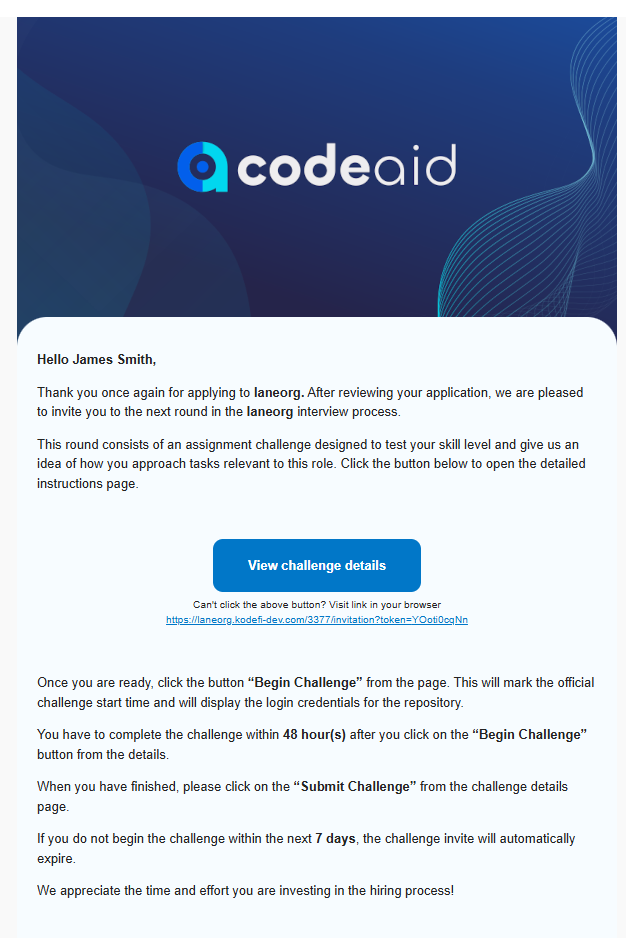
- 8
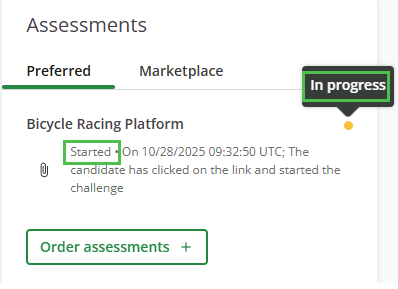
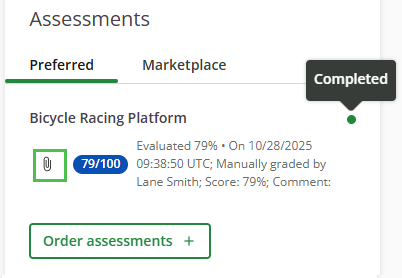
Once the candidate is invited, the pop-up will close, and you will see the assessment in pending status.
- 9
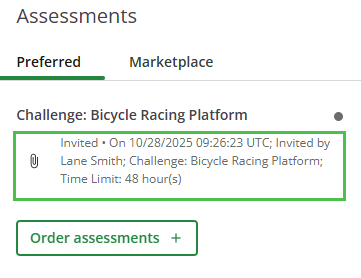
Refresh the page to see the latest activity.
- 10
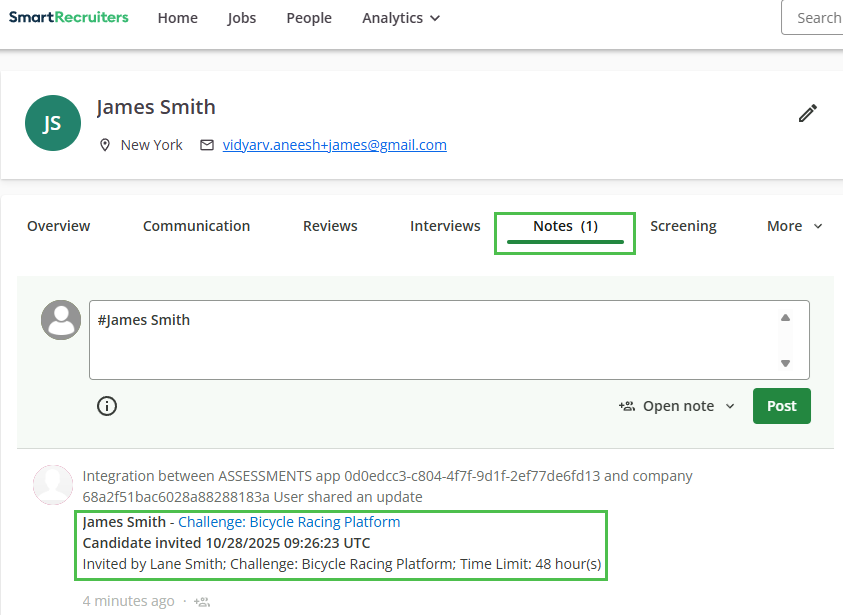
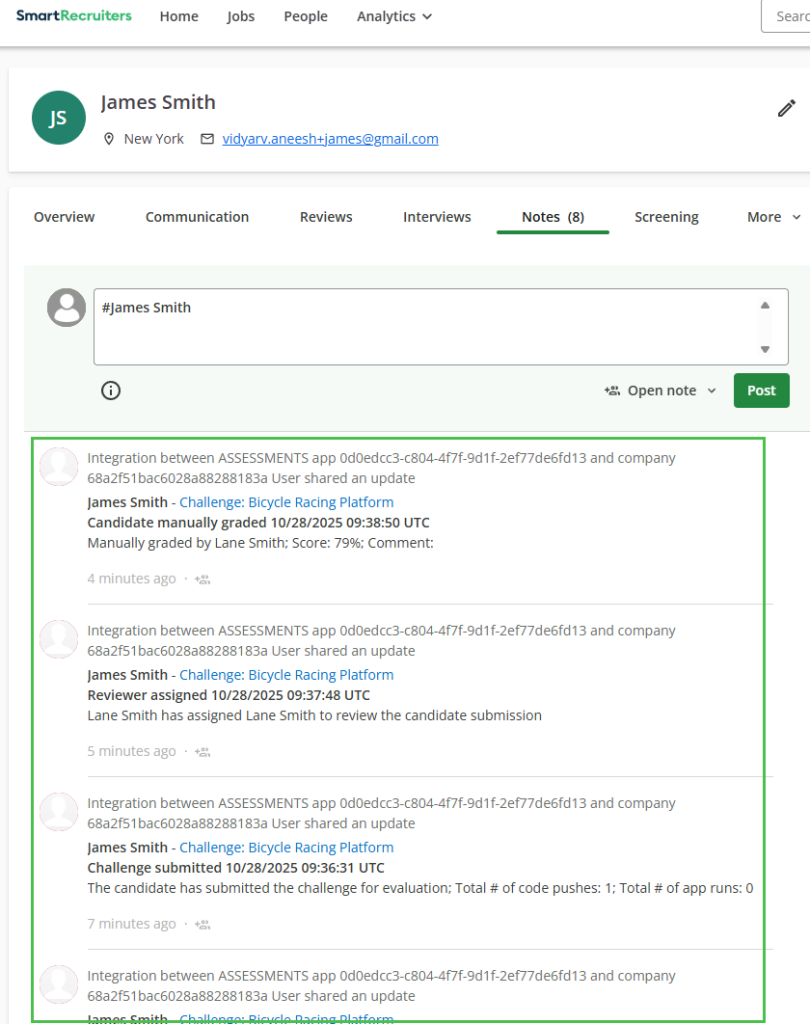
All the activities will be recorded in the 'Notes' section as well.
Integration Workflow — Automatically Triggering an Assessment
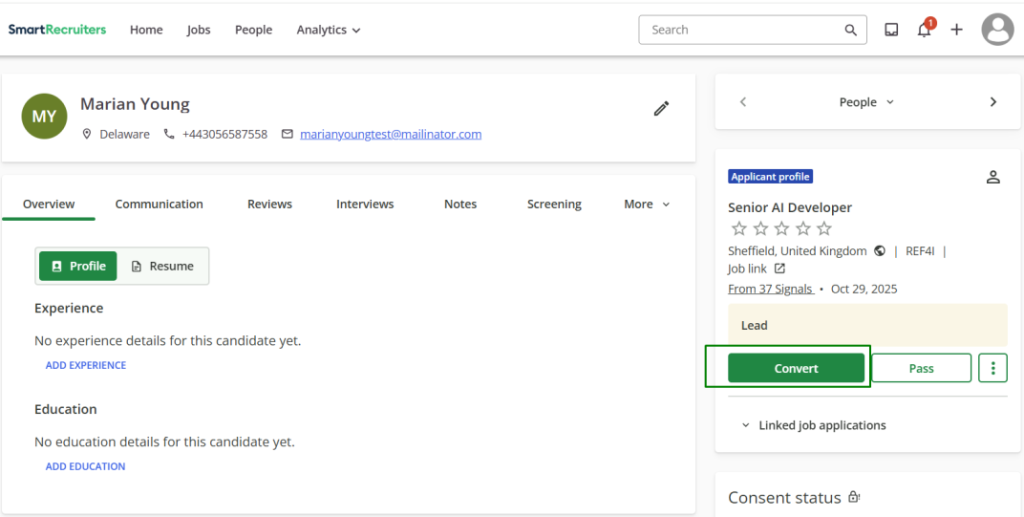
- 1
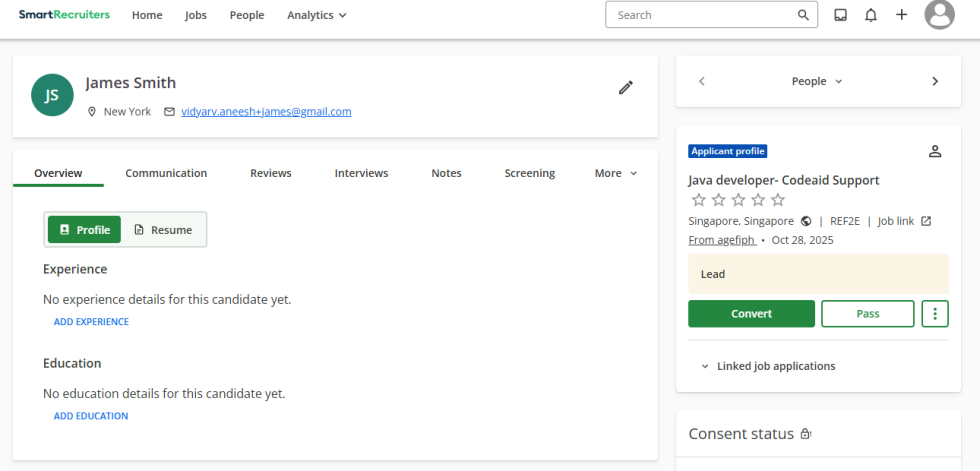
Open a candidate record.

- 2
Click the Convert button.
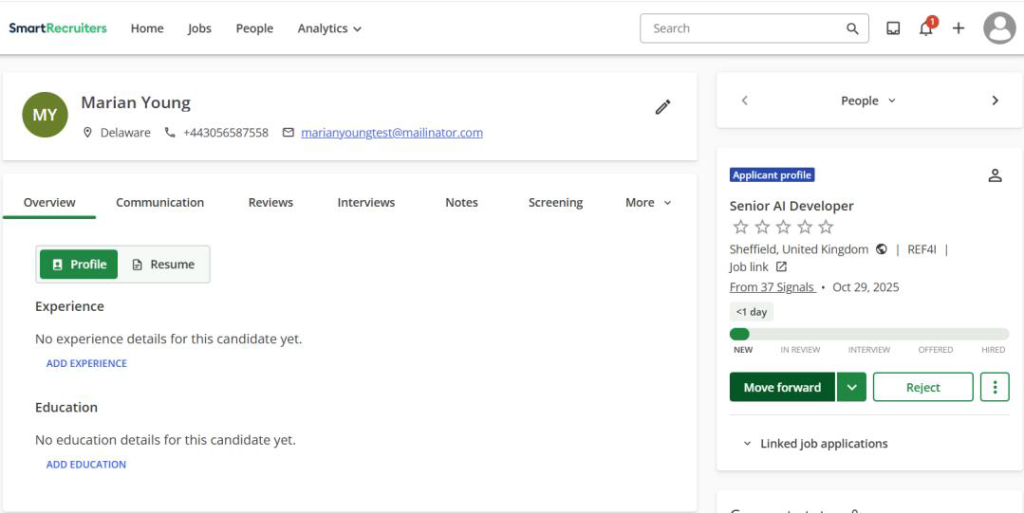
- 3
The Move Forward button will now appear.
- 4
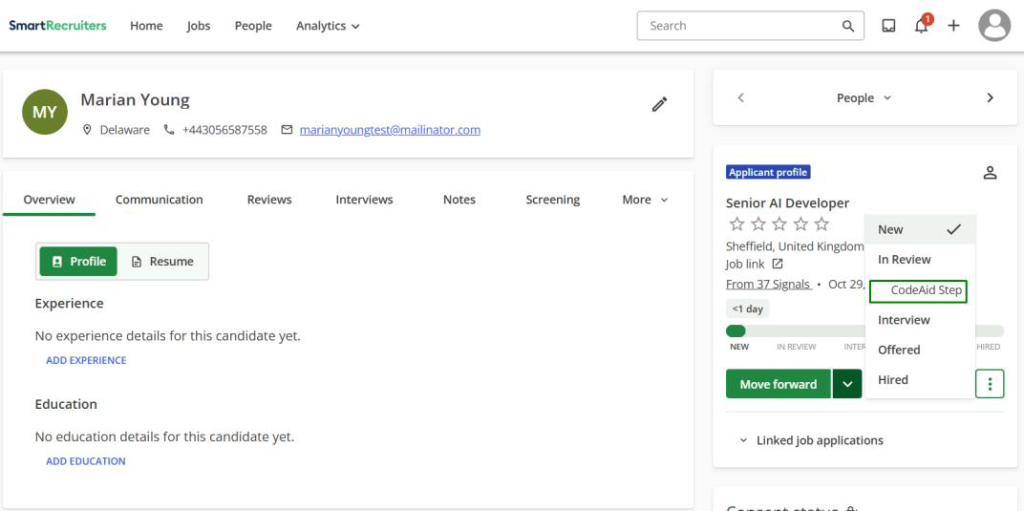
Click the dropdown arrow next to Move Forward.
- 5
The custom step you added will appear under the stage where you added it.
- 6
Move the candidate to that step.
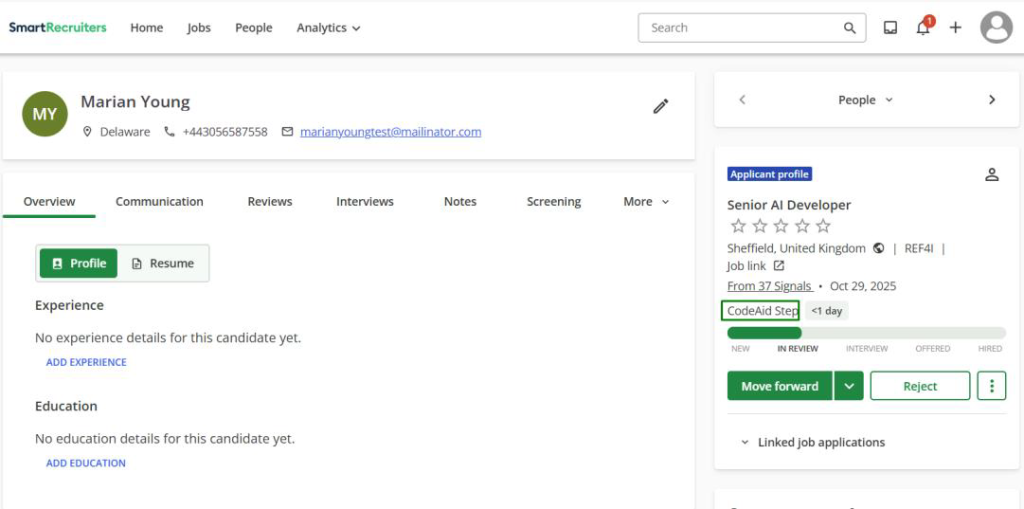
- 7
This will automatically trigger sending a Codeaid test invitation to the candidate via email.
Viewing Results in SmartRecruiters
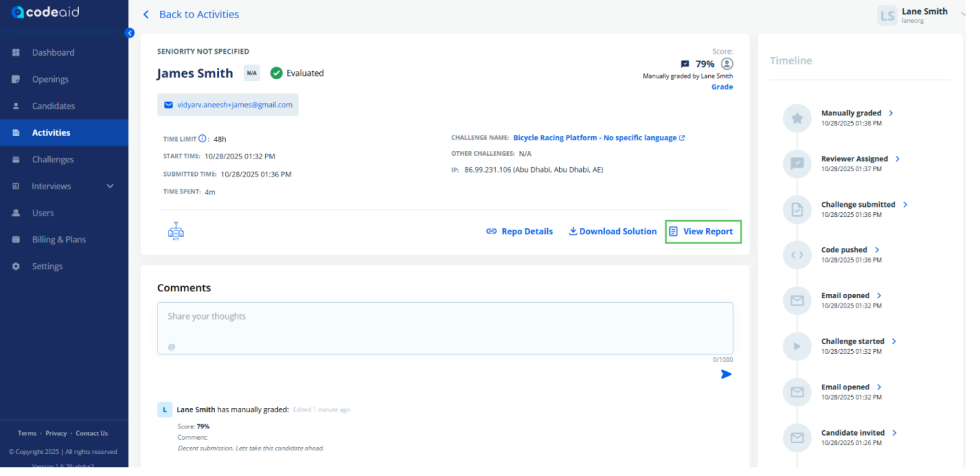
- 1
At any point during the evaluation, to view candidate details in Codeaid, click on the paper clip icon.
- 2
This will open the candidate URL in Codeaid.
- 3
Click 'View Report' to see the grading criteria of Codeaid.
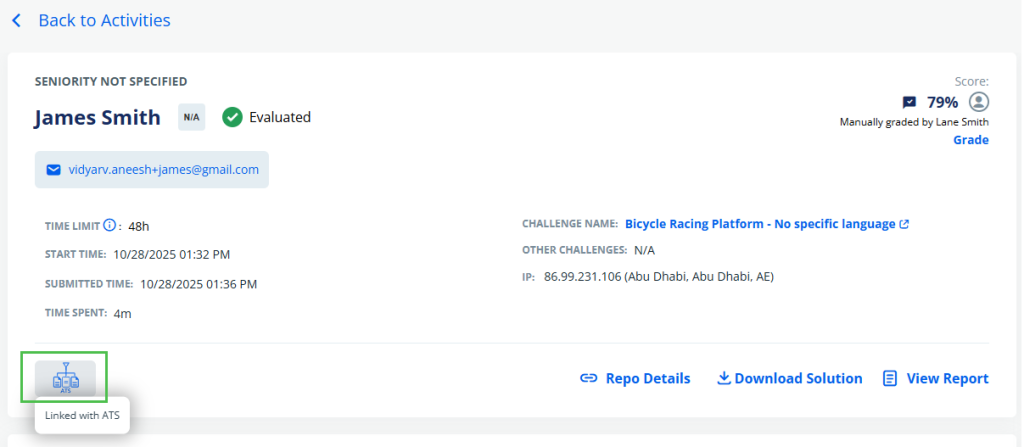
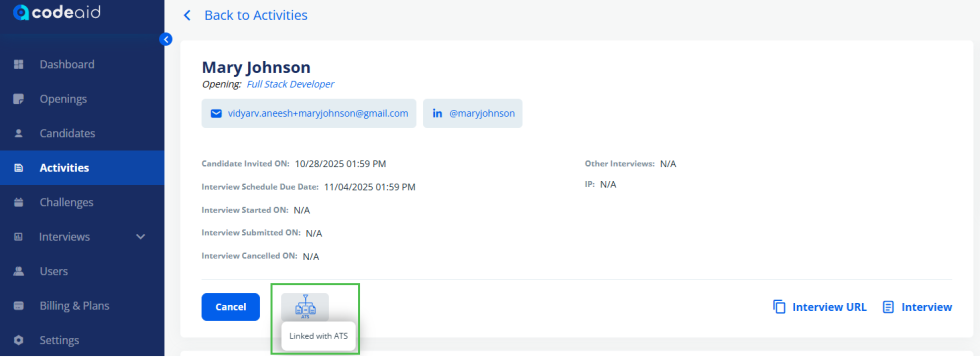
- 4
In Codeaid, you can see that the ATS link button is enabled and clicking it will open the candidate link in SmartRecruiters.
- 5
In SmartRecruiters, you can track the candidate timeline in detail by clicking 'Notes'.
Linking Codeaid Candidates with SmartRecruiters — Case 1: Candidate Not Yet in Codeaid
- 1
Log in to your SmartRecruiters account.
- 2
Open the People page from the navigation bar.
- 3
Open a candidate record.
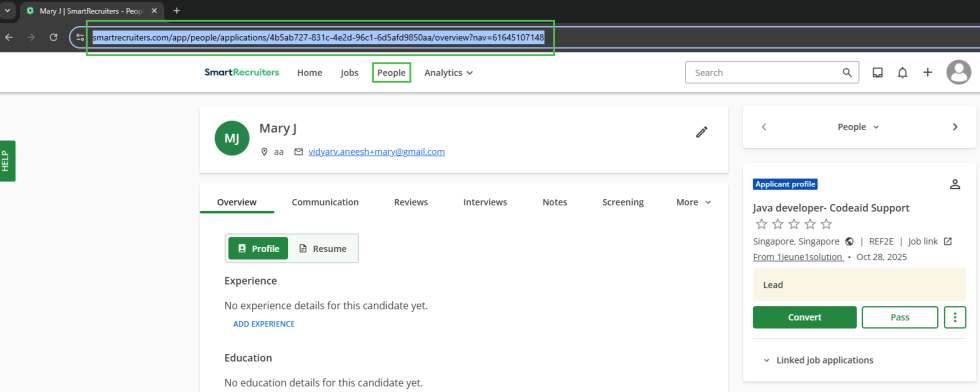
- 4
Copy the URL on the address bar.
- 5
Log in to your Codeaid account.
- 6
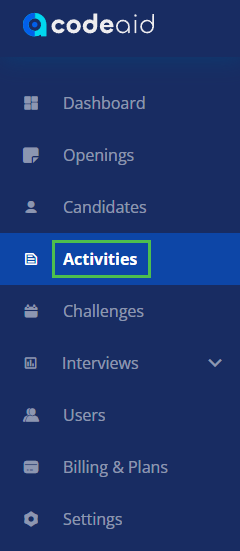
From the sidebar, click Activities.
- 7
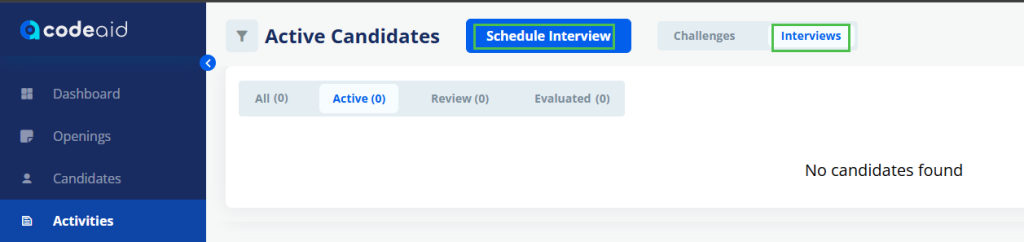
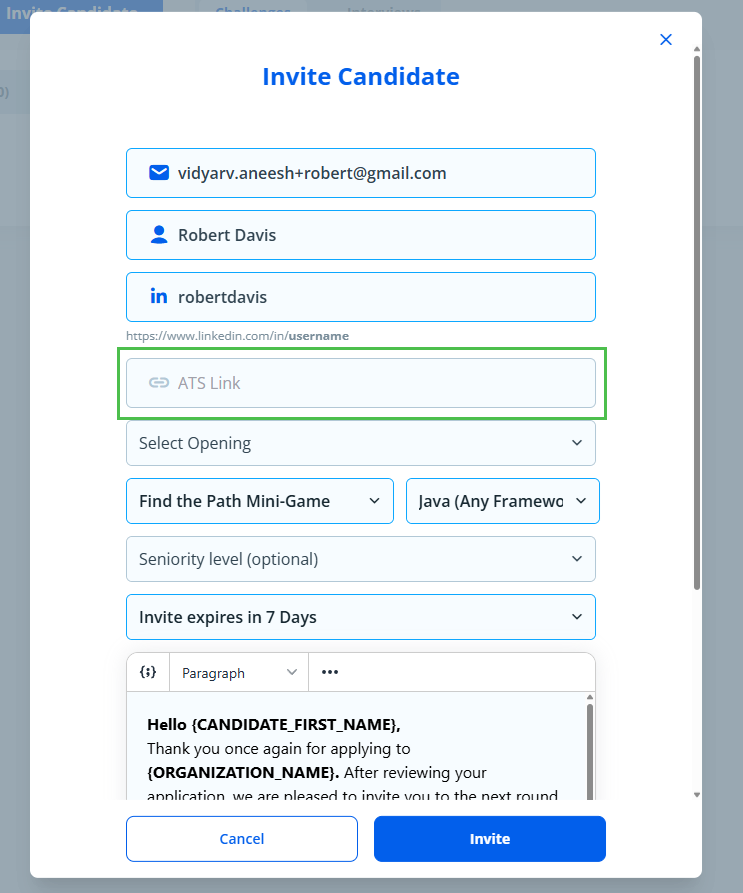
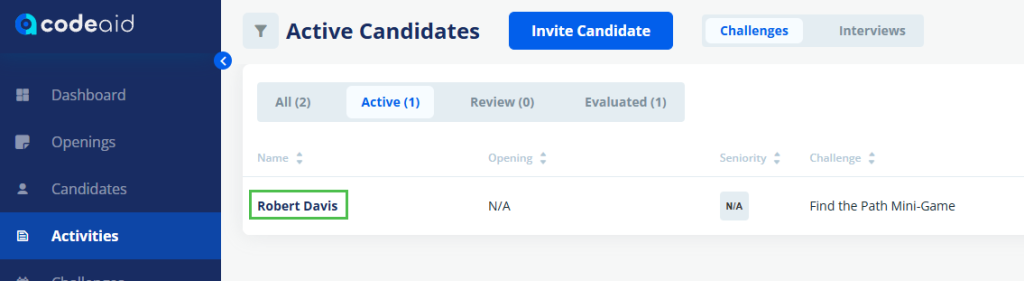
Invite the candidate to a challenge or schedule an interview.
- 8
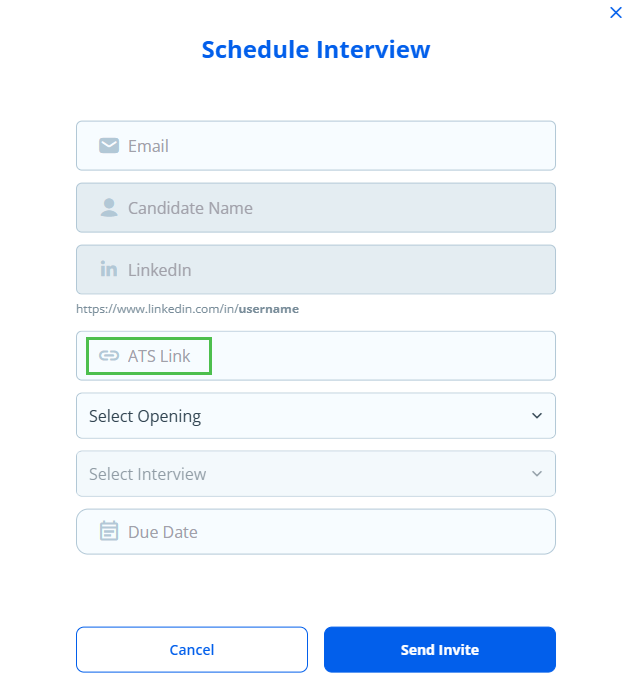
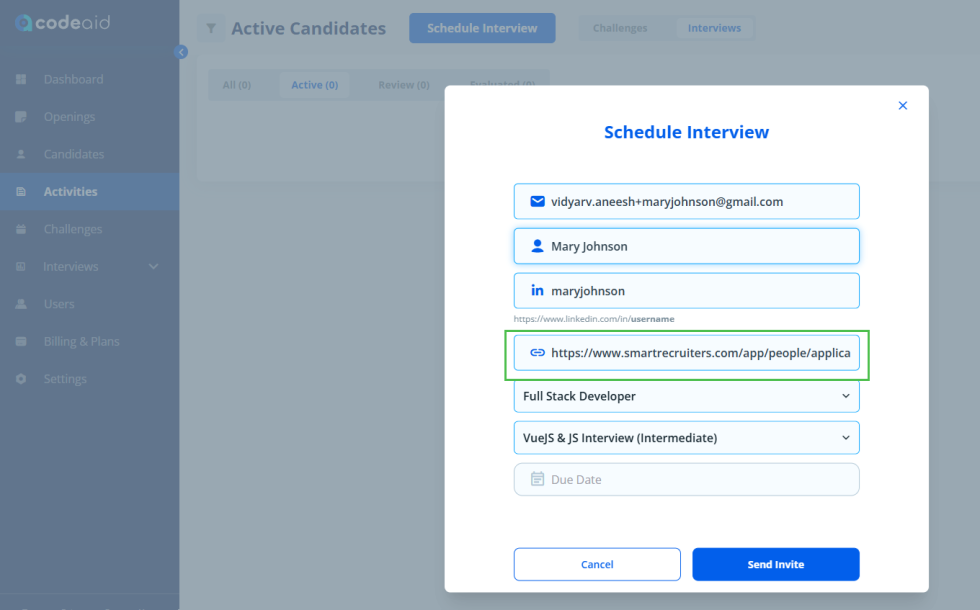
You will see an 'ATS link' field where you can provide the copied URL.
- 9
Fill out the invite form and paste the copied URL into the 'ATS link' field.
- 10
Send the invite after confirming your choices.
- 11
You can see that the ATS button is active and blue in color. Clicking it will open the candidate URL in SmartRecruiters.
Linking Codeaid Candidates with SmartRecruiters — Case 2: Candidate Already in Codeaid
- 1
In Codeaid, invite a candidate without filling in the 'ATS link' field.
- 2
Click on the candidate's name to view their details.
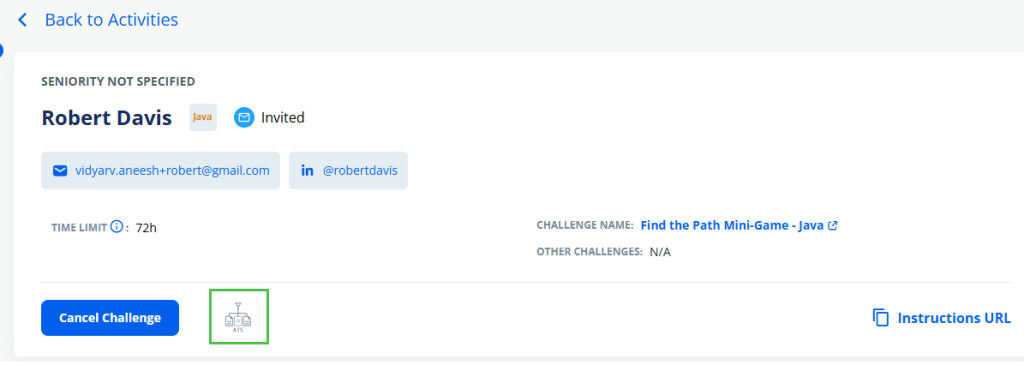
- 3
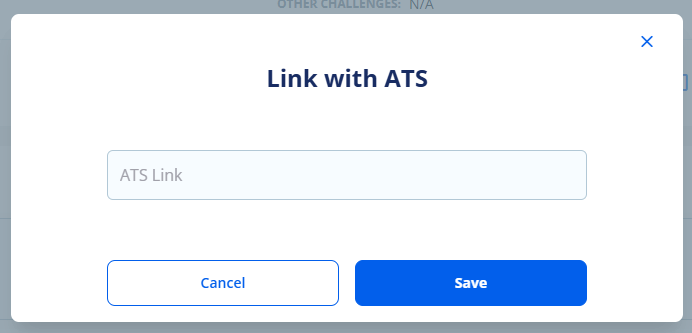
Click the ATS button, which is inactive and grey in color.
- 4
'Link with ATS' pop-up will appear.
- 5
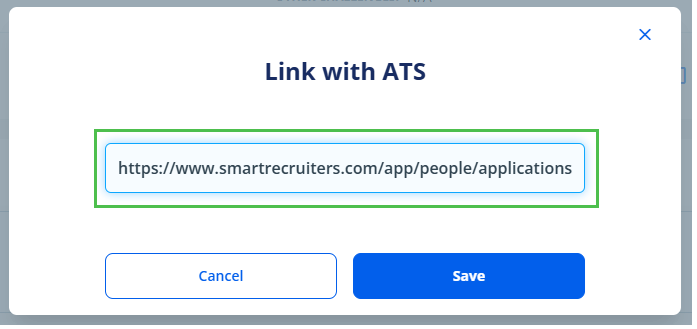
Paste the candidate URL in 'ATS link' field.
- 6
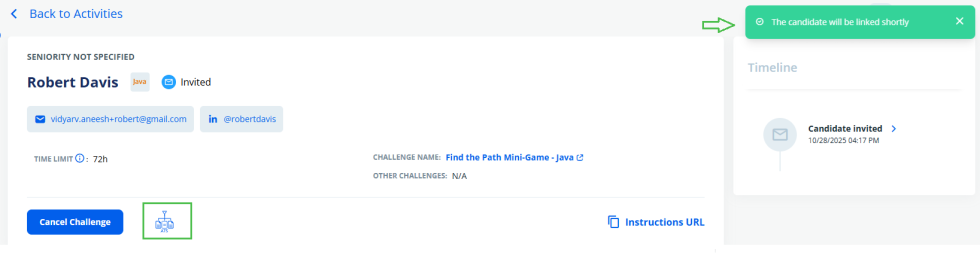
Click Save.
- 7
The candidate will be linked successfully in a few minutes and the ATS button will turn blue.
Need more help?
For additional information not covered here, reach out to our support team.
Contact Support